


PRINTER PLUS - SOFTWARE - ANDROID APP
Print from your app, web, images or PDF to ESC/POS, CPCL printers
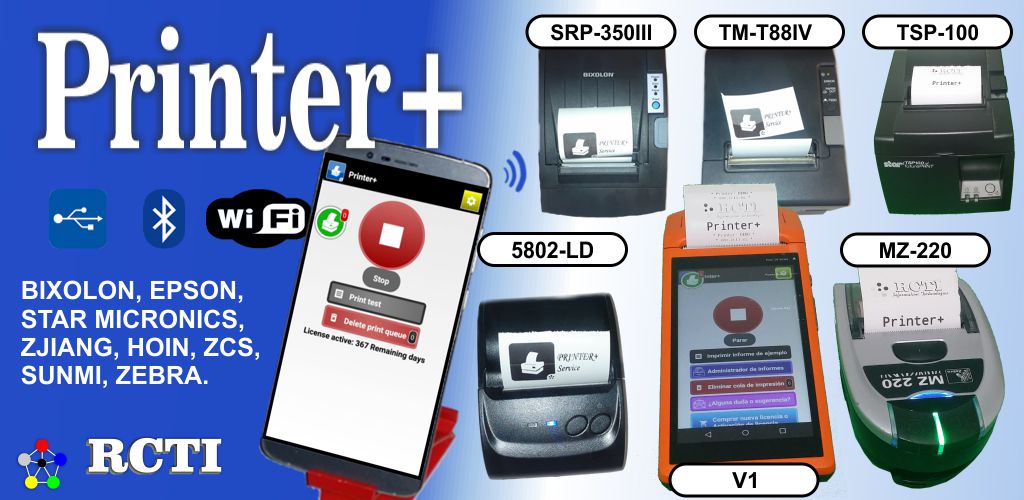
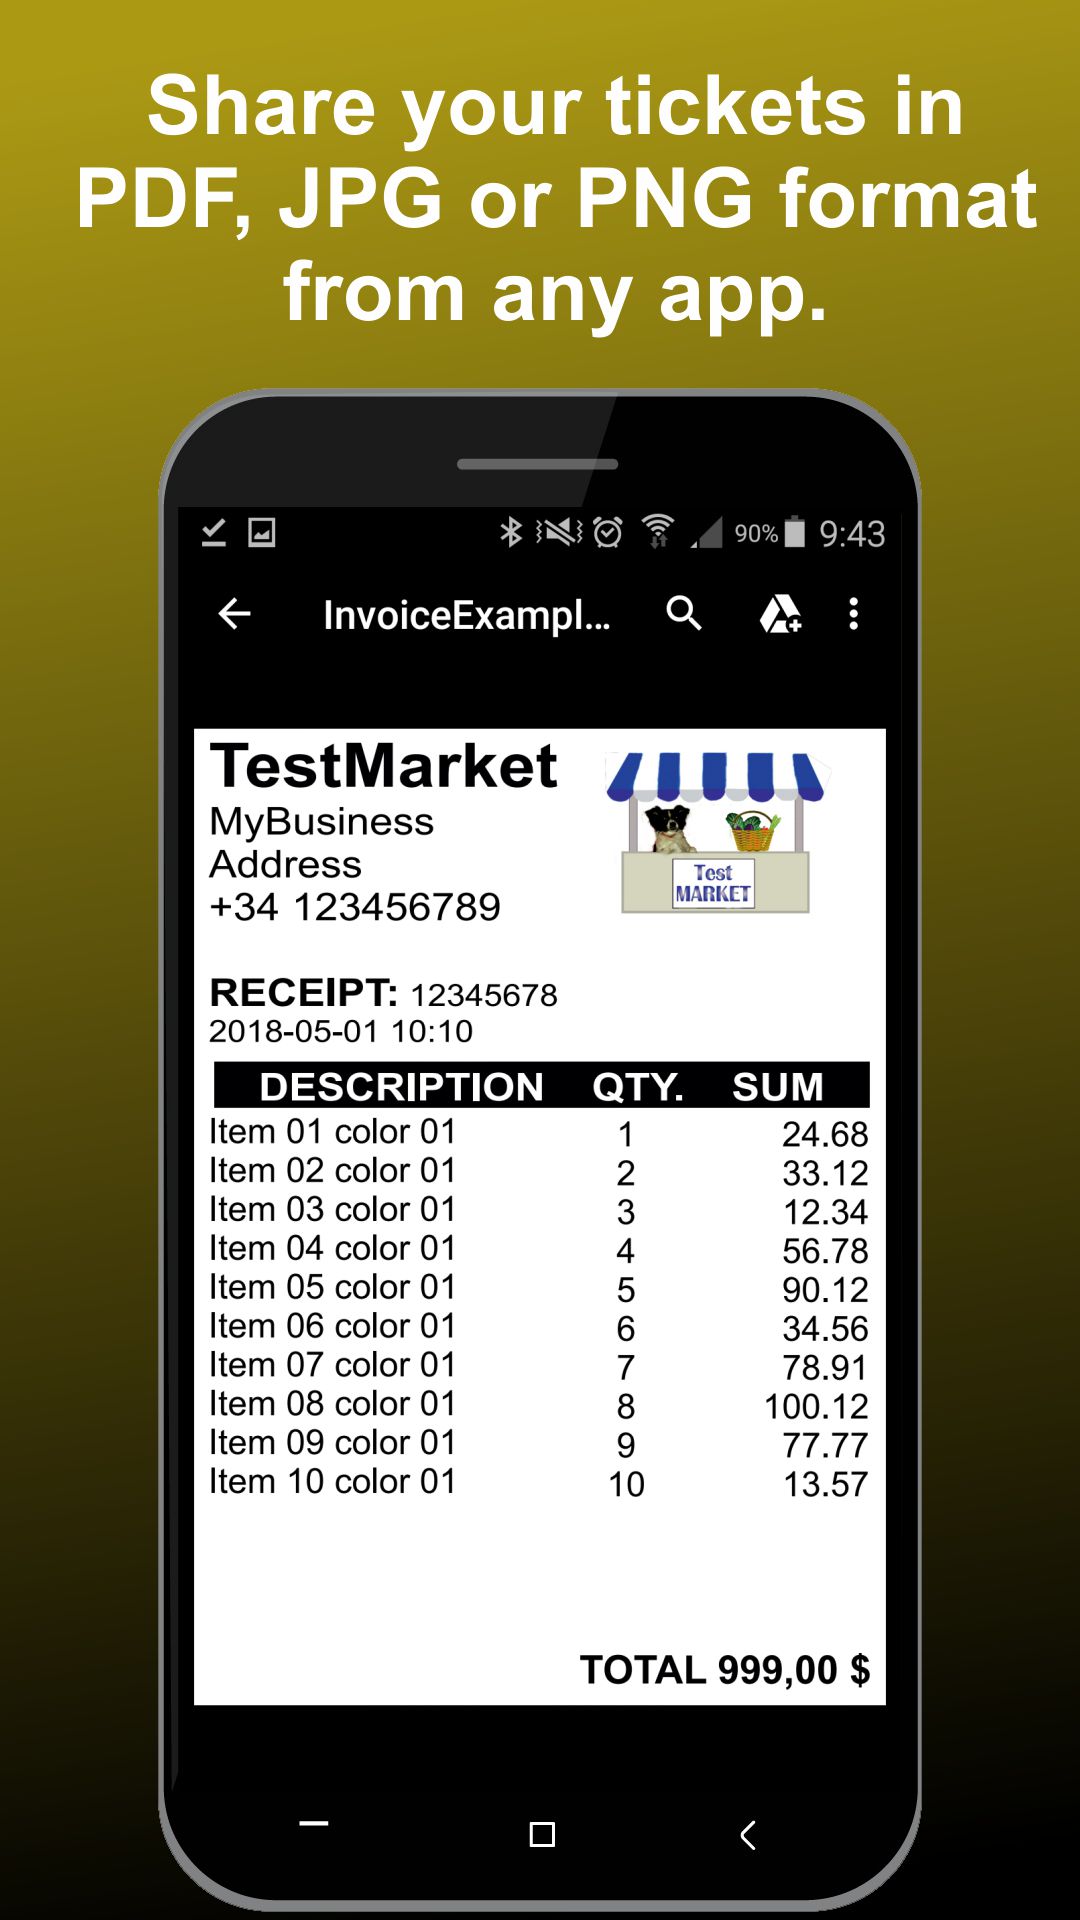
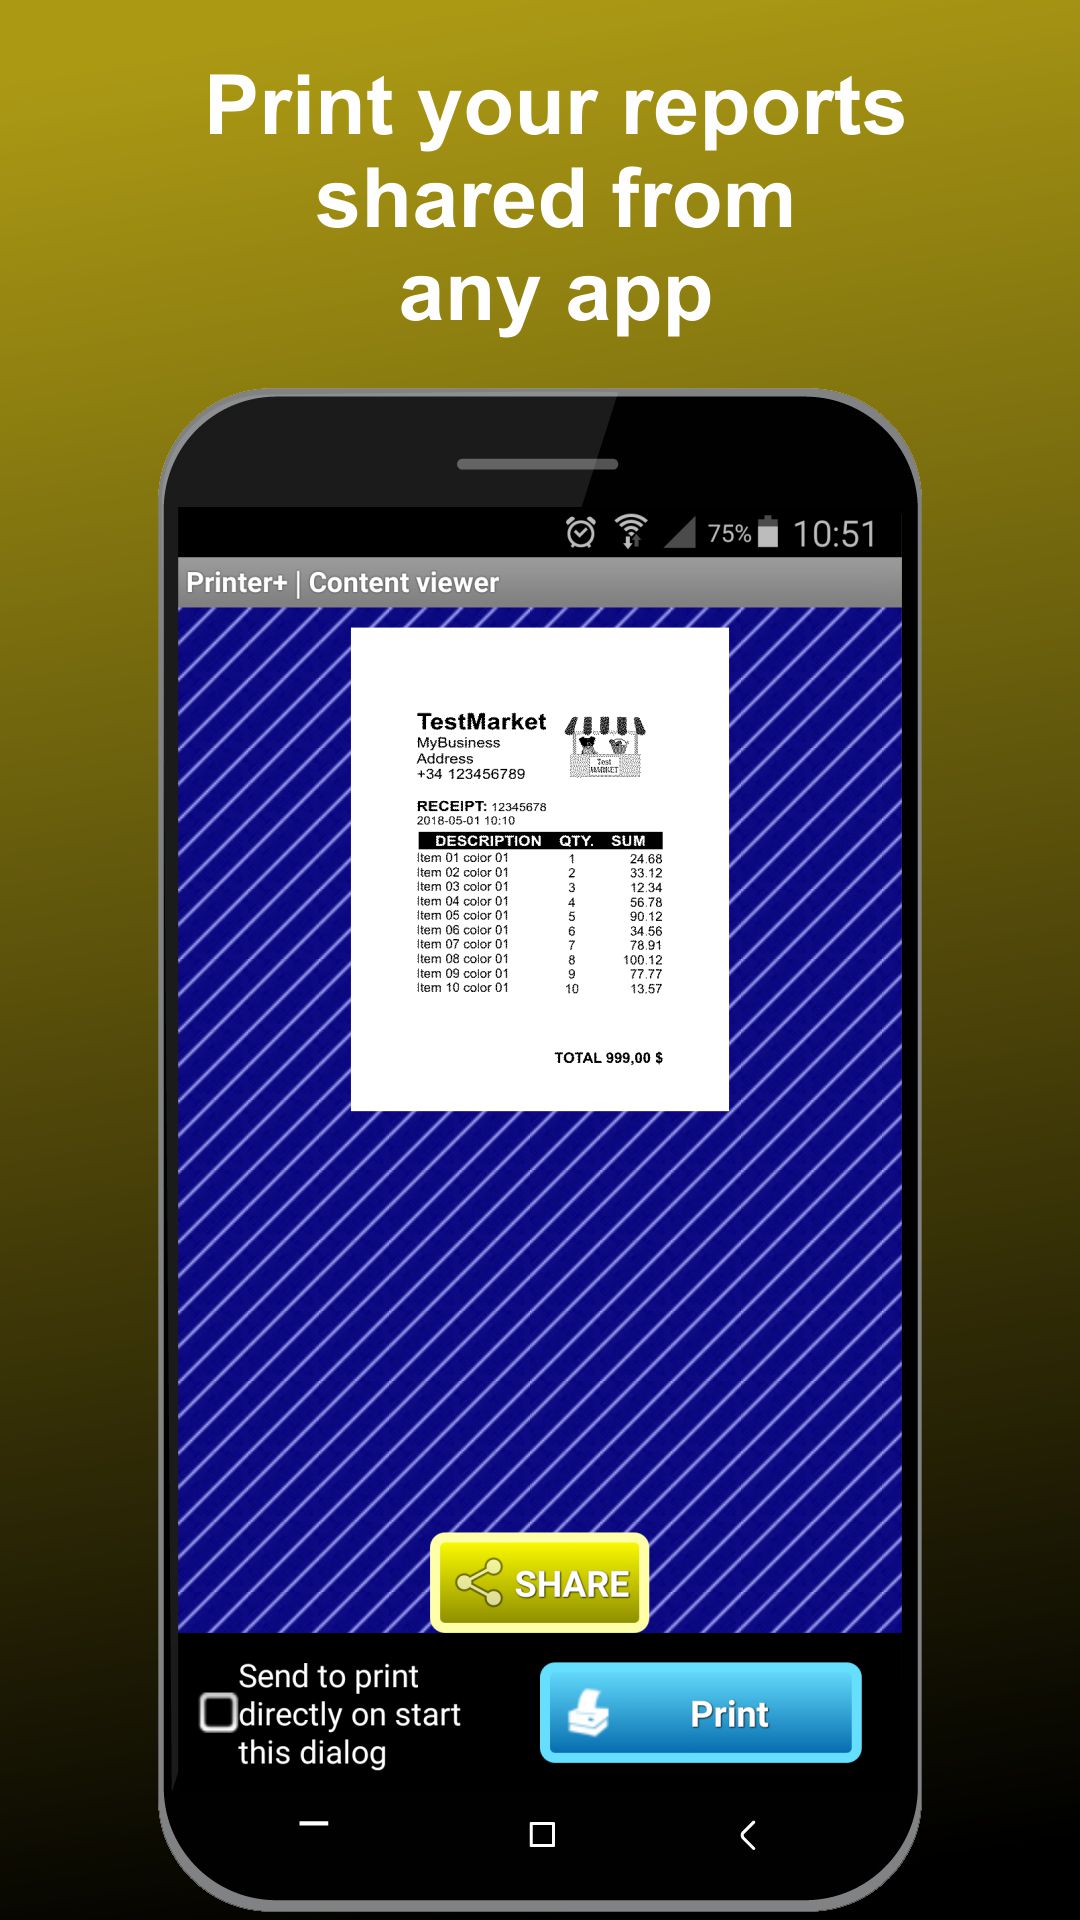
Printing service that allows you to use thermal printers to print via usb, wifi and bluetooth. From any application sharing images (JPEG or PNG), Text or PDF, also using our SDK for JAVA programmers or also from your WEB-APP implementing our SDK for WEB.

 BUY
BUY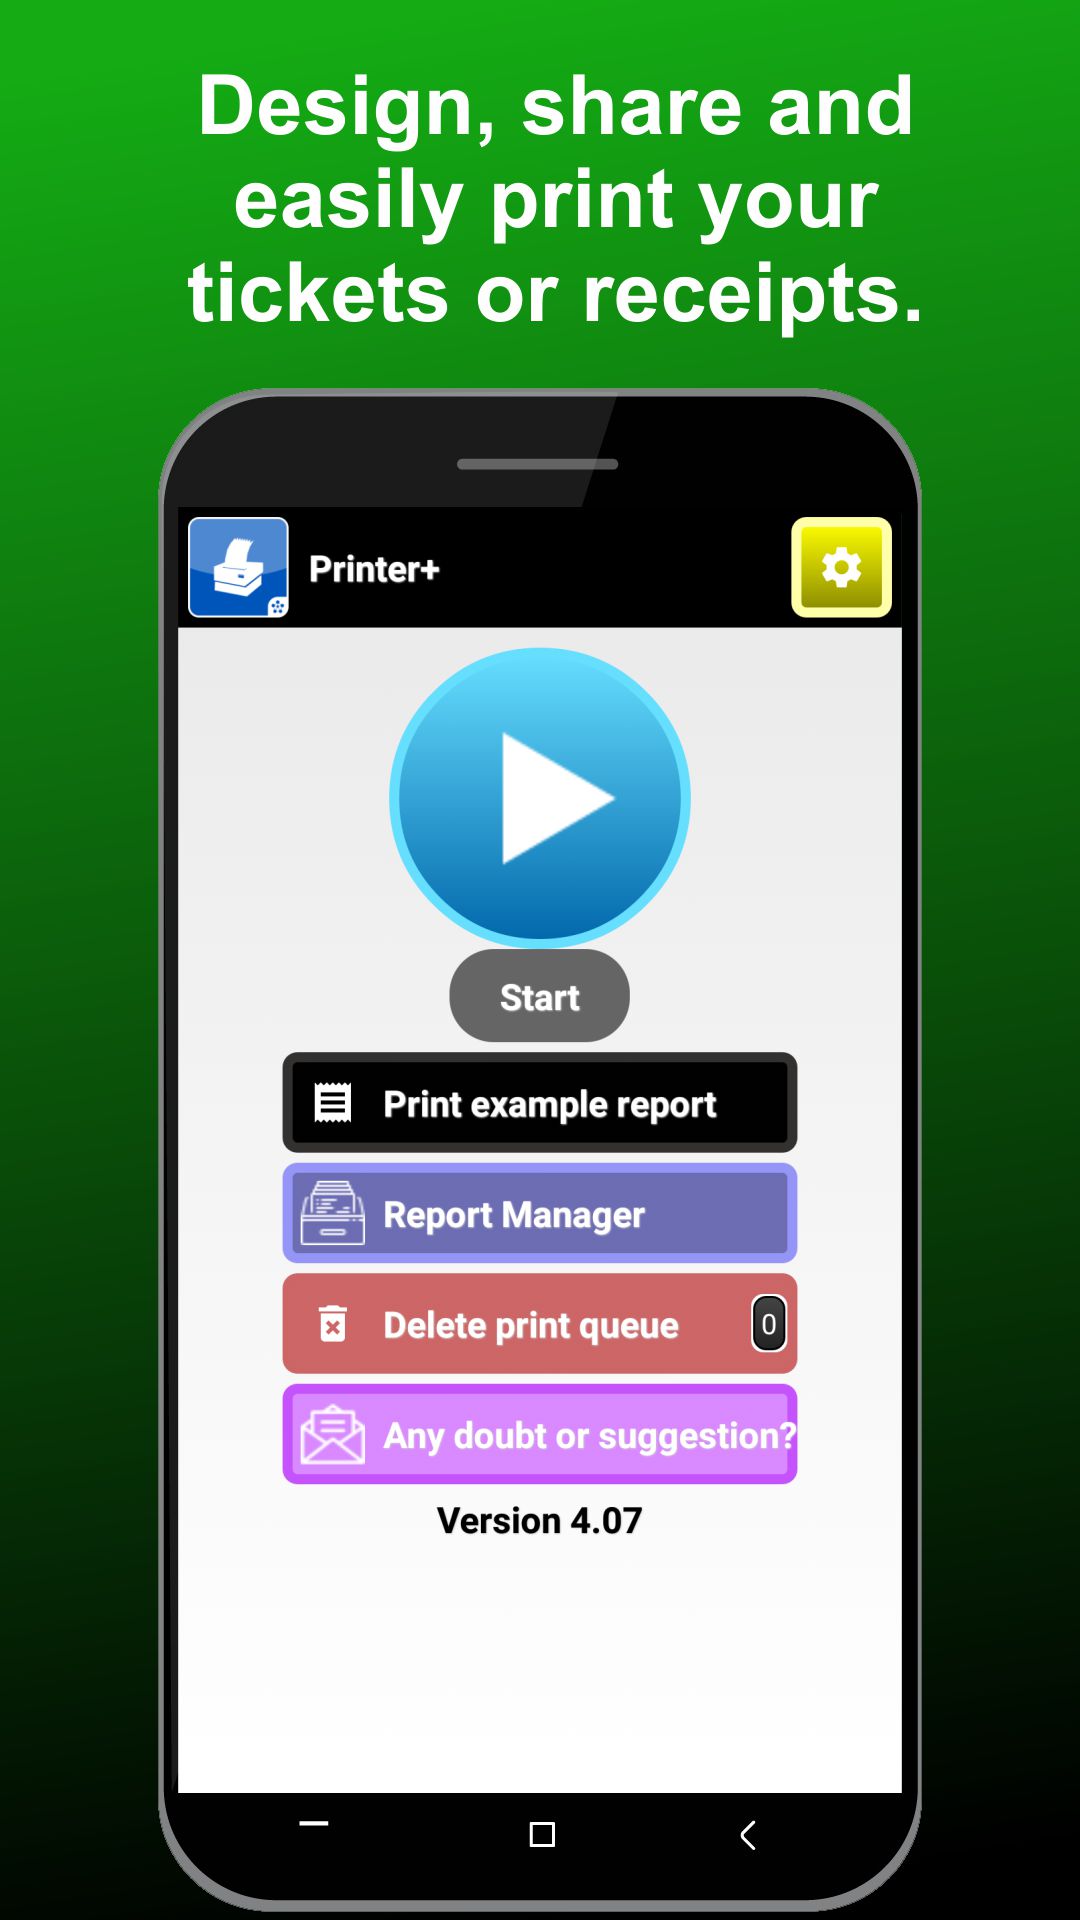
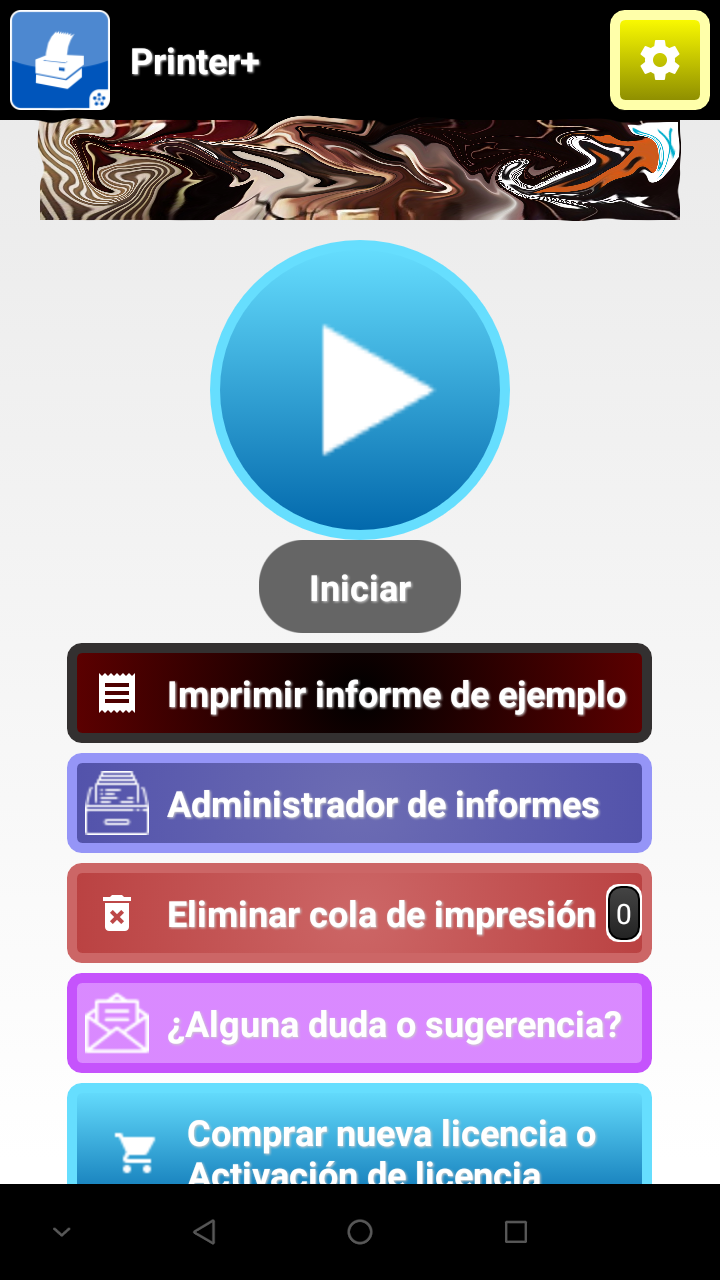
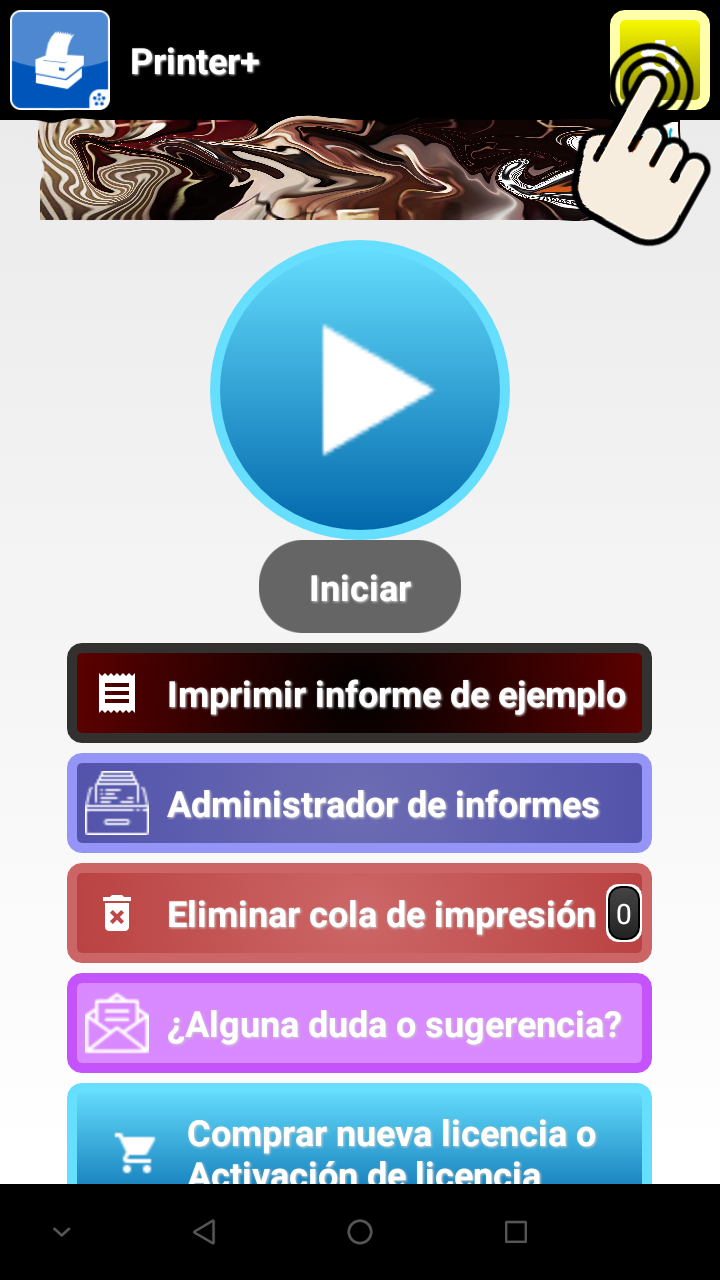
Printer+ is an App-Service that allows the communication of an Android device with different brands and models of ticket printers, in a few simple steps.
FEATURES
► Print PDF.
► Print images.
► Print text (Unicode - Any language supported from your system).
► Print Barcodes, QR.
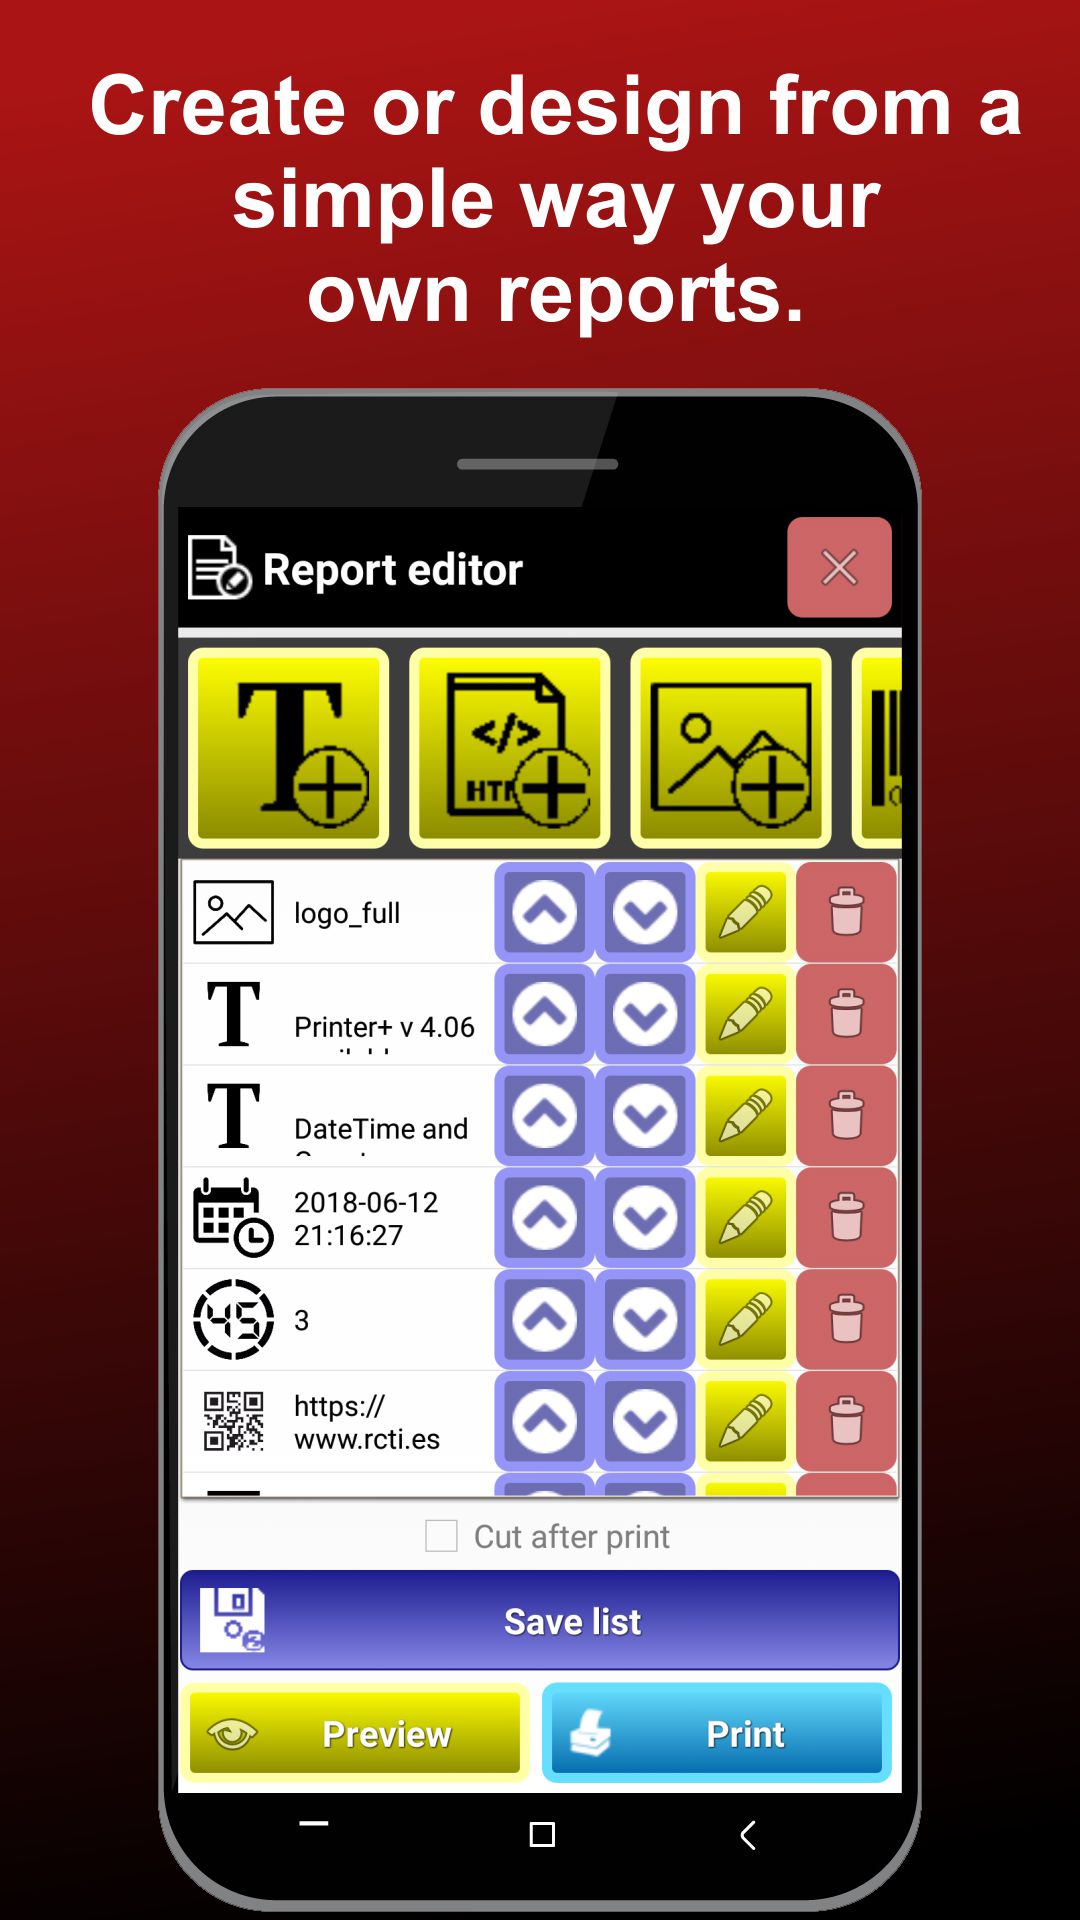
► Design and print your reports.
REQUIREMENTS
► Device with ANDROID 4.1 (Jelly Bean) or higher.
► Bluetooth (optional).
► USB (optional).
► Wifi/LAN (optional).
► Camera (optional).
► Does not require ROOT.
► Does not require internet.
LANGUAGES
► Español
► Inglés
► Catalán
NEWS
2019/10/28 - Google Chrome Print Button Doesn't Work
Several users emailed us to tell about, when they send to print something it ramains waiting or loading after press print button. It was a bad update from Google Chrome.
The solution consist in go to PlayStore, search Google Chrome and uninstall after this it allows you to use Google Chrome basics which opens and work fine with our HTML print button.
TUTORIALS
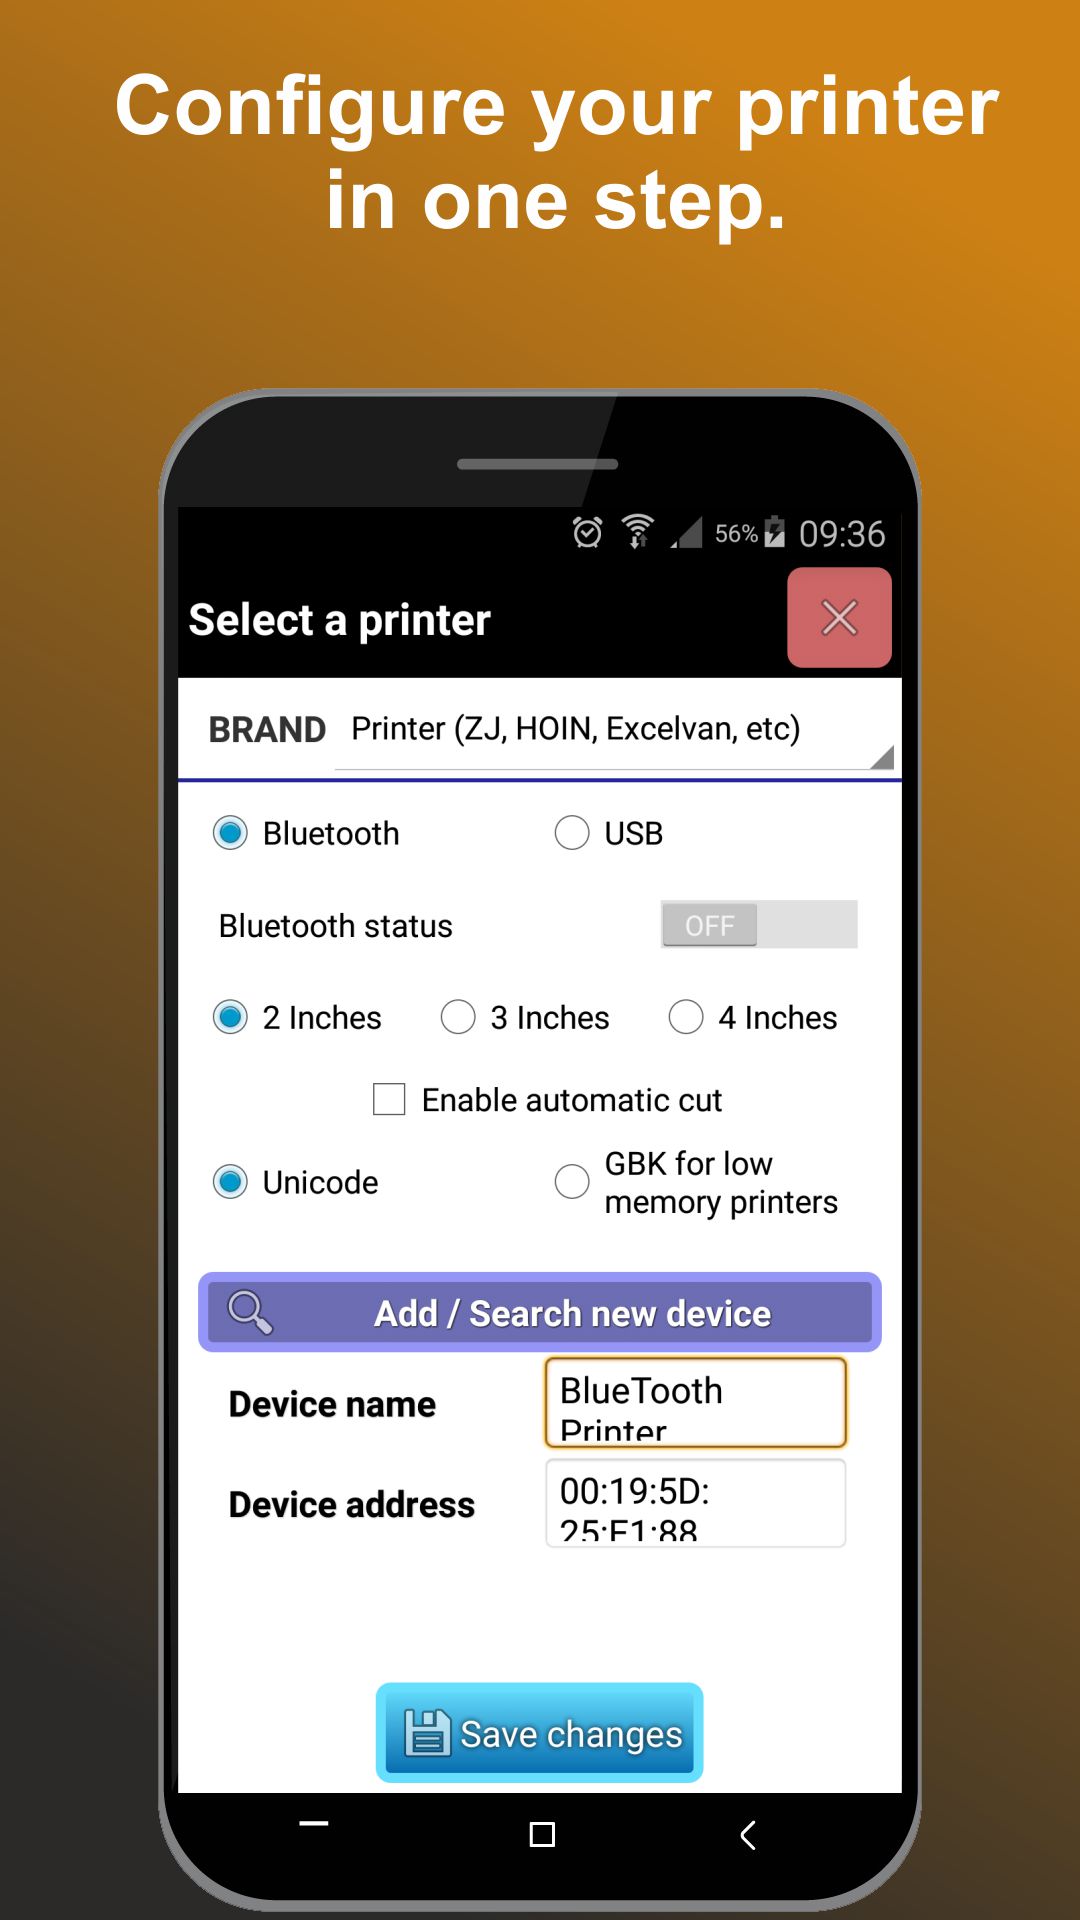
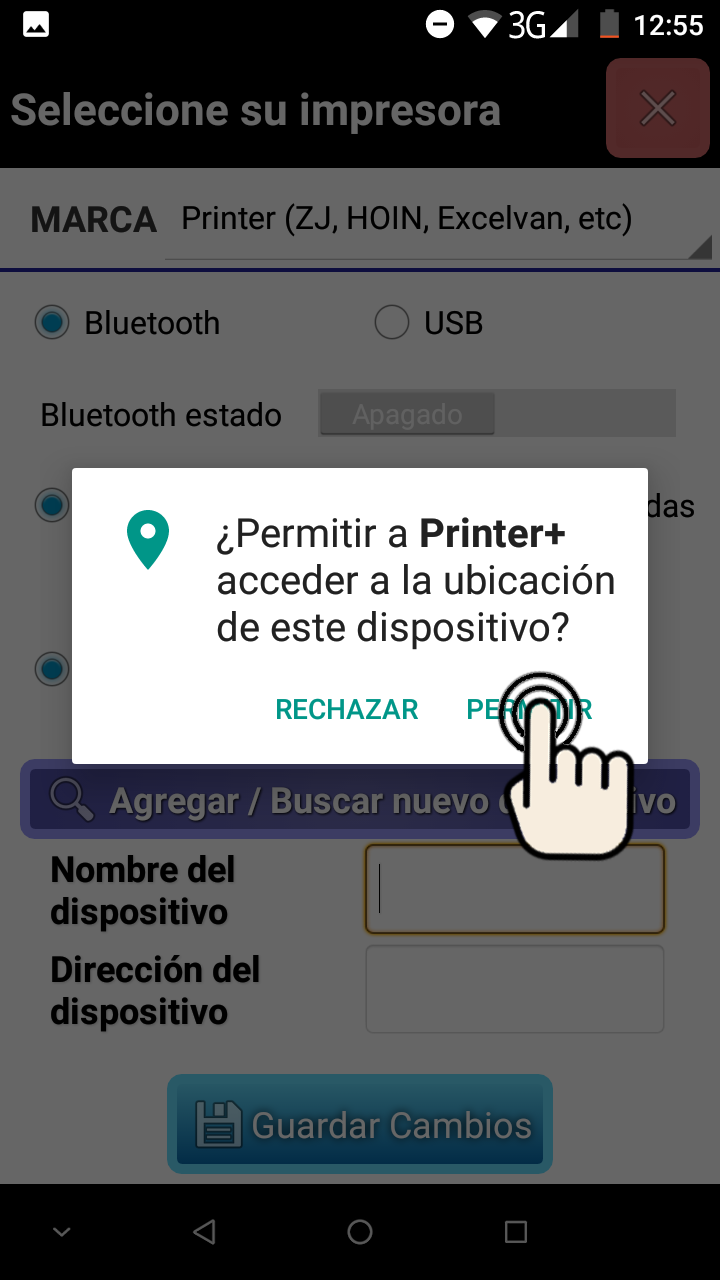
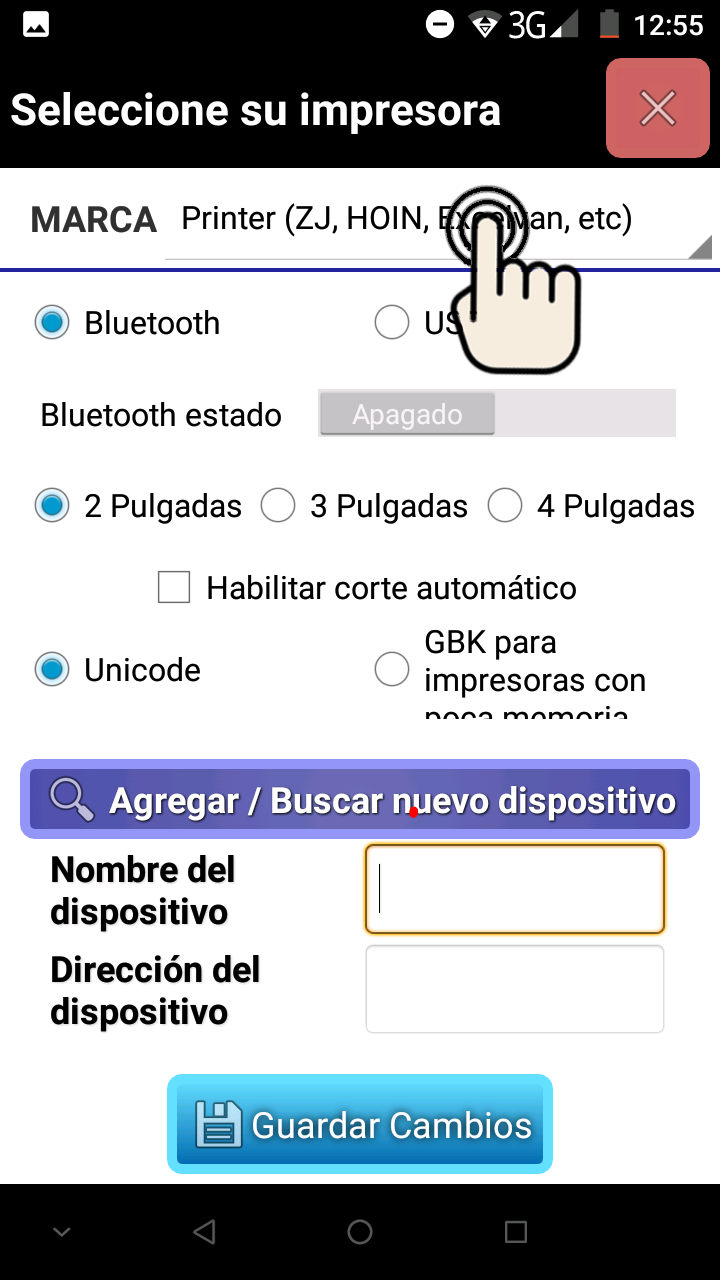
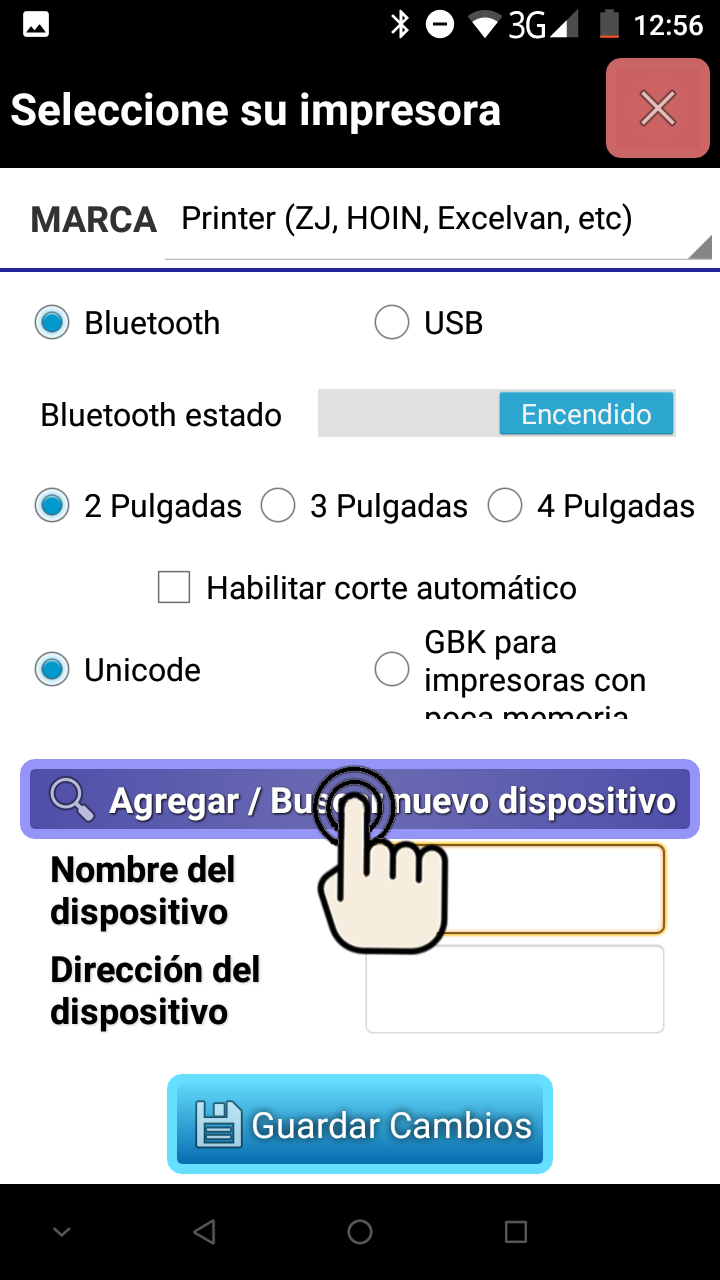
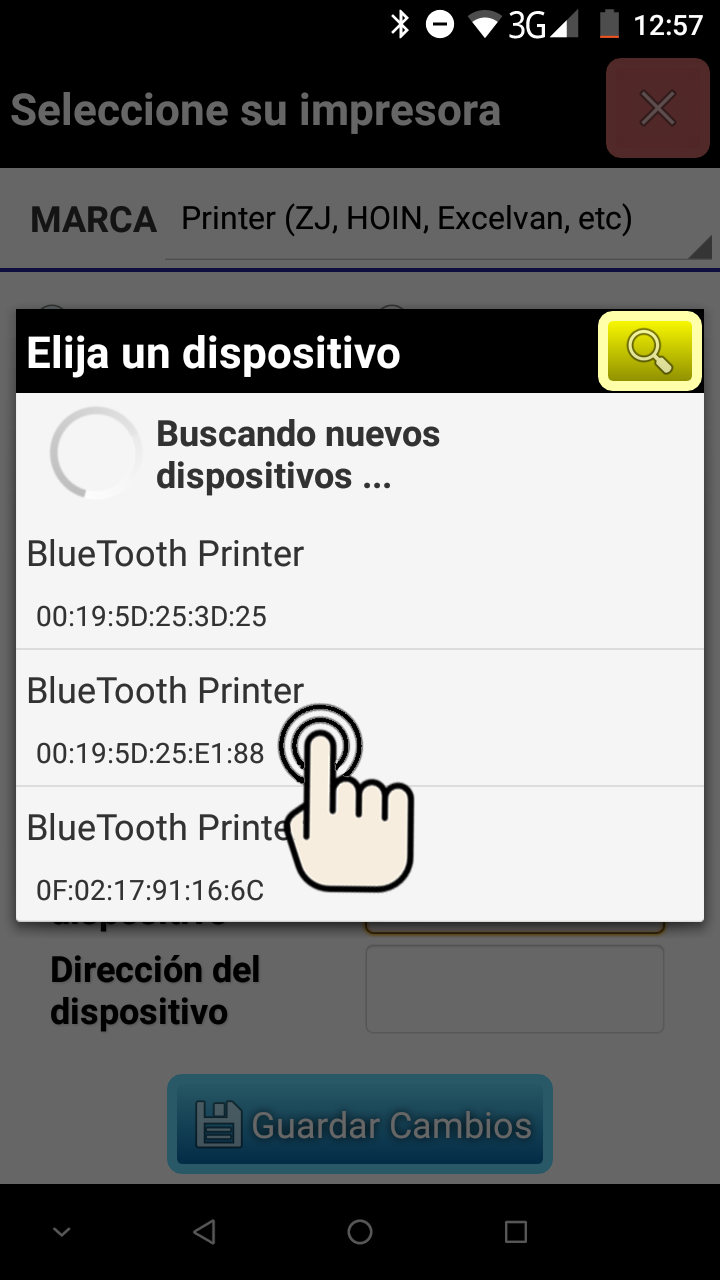
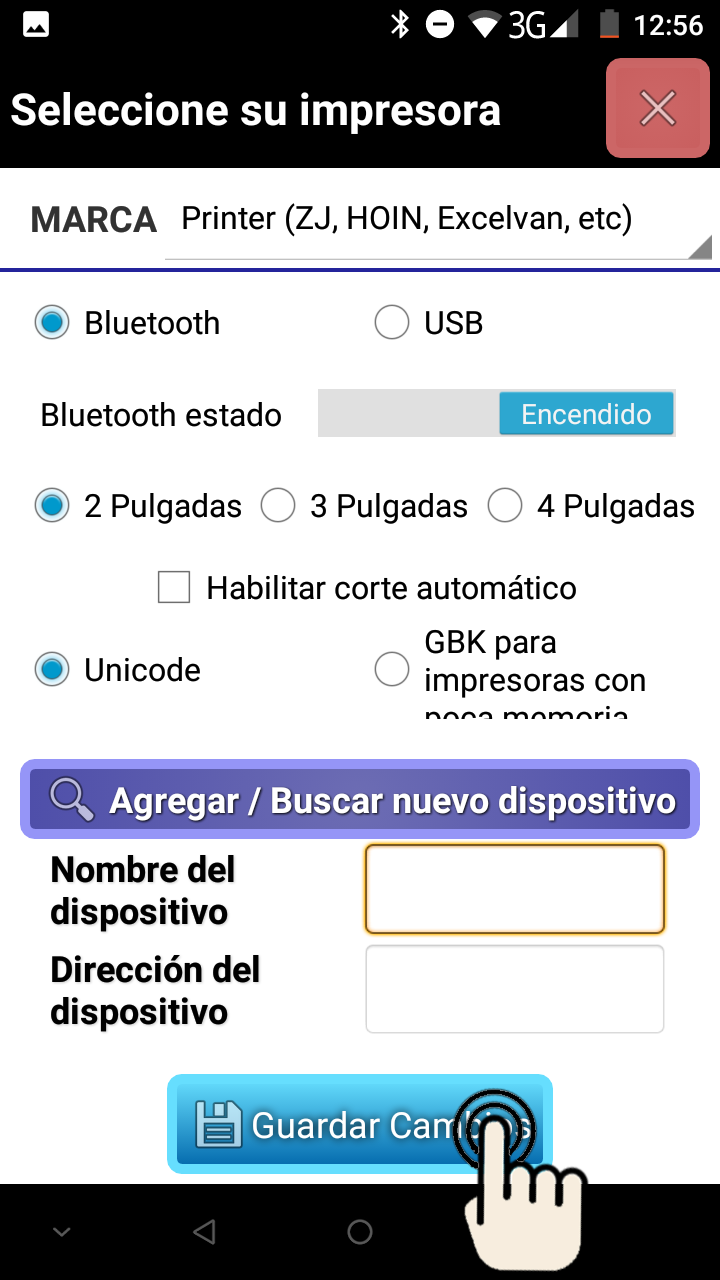
Printer Setup
Once installed Printer + and having accepted the agreement of use of the app (EULA) proceed to the configuration of the printer.


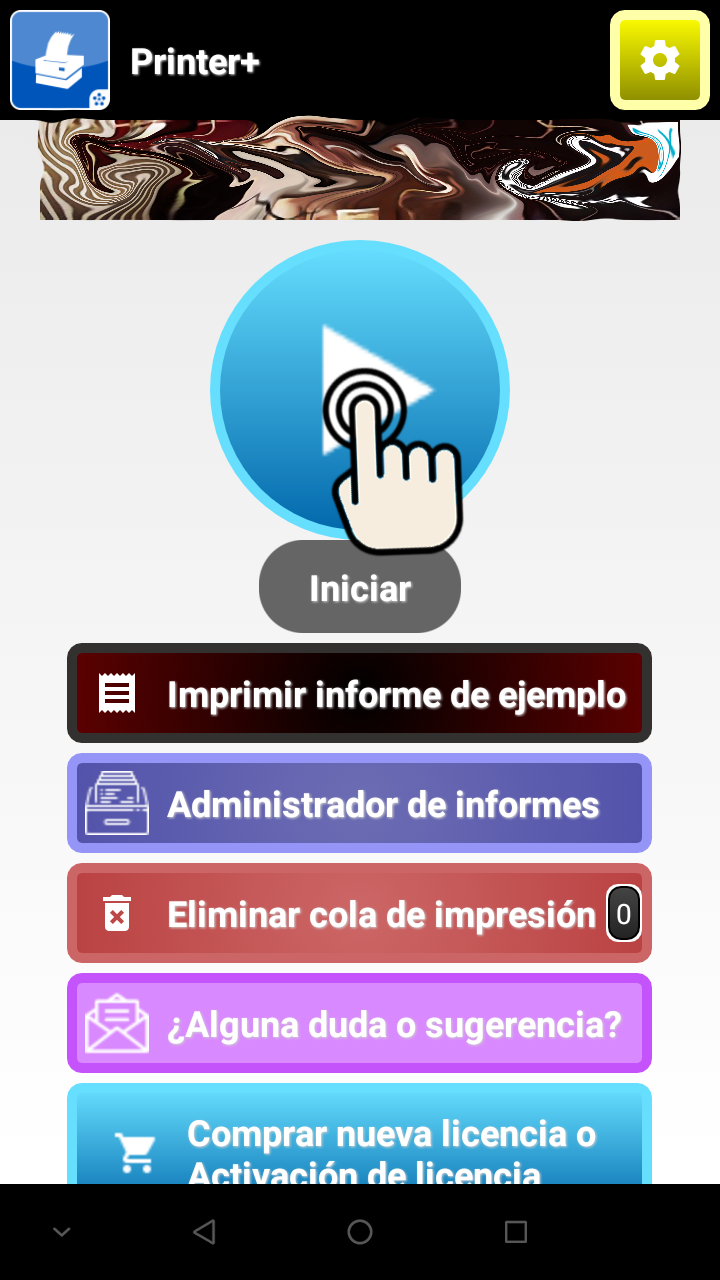
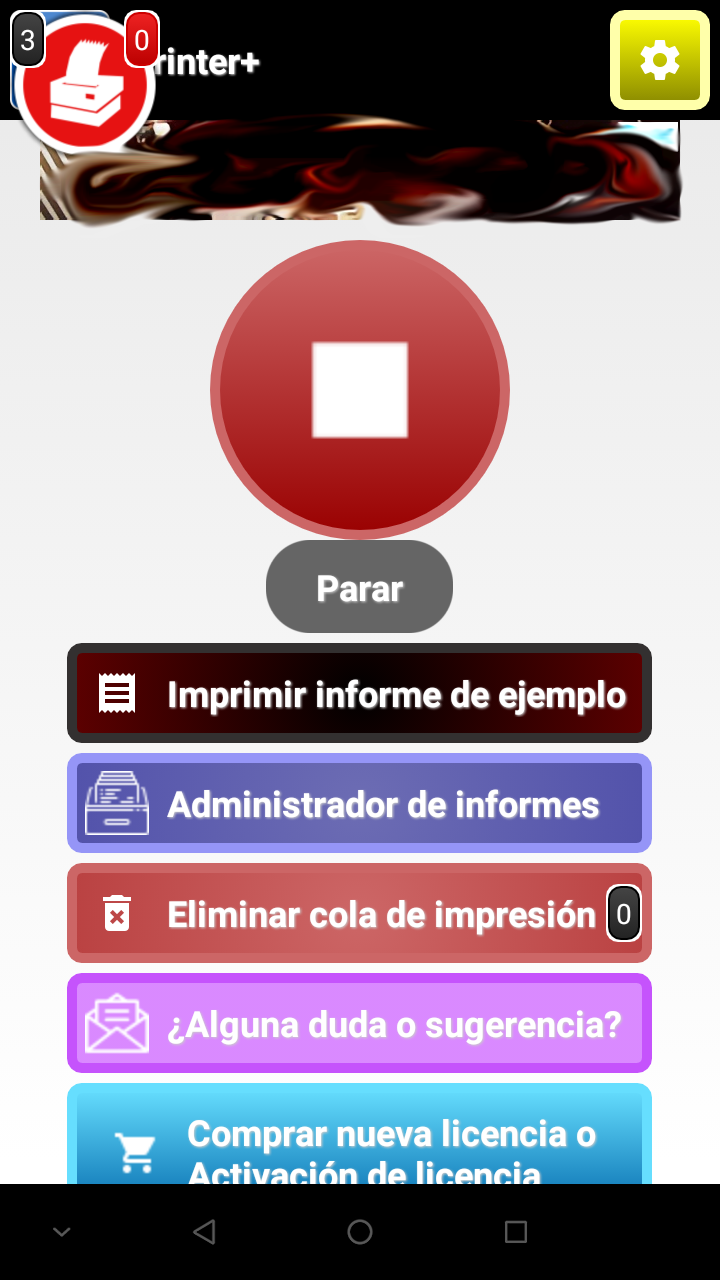
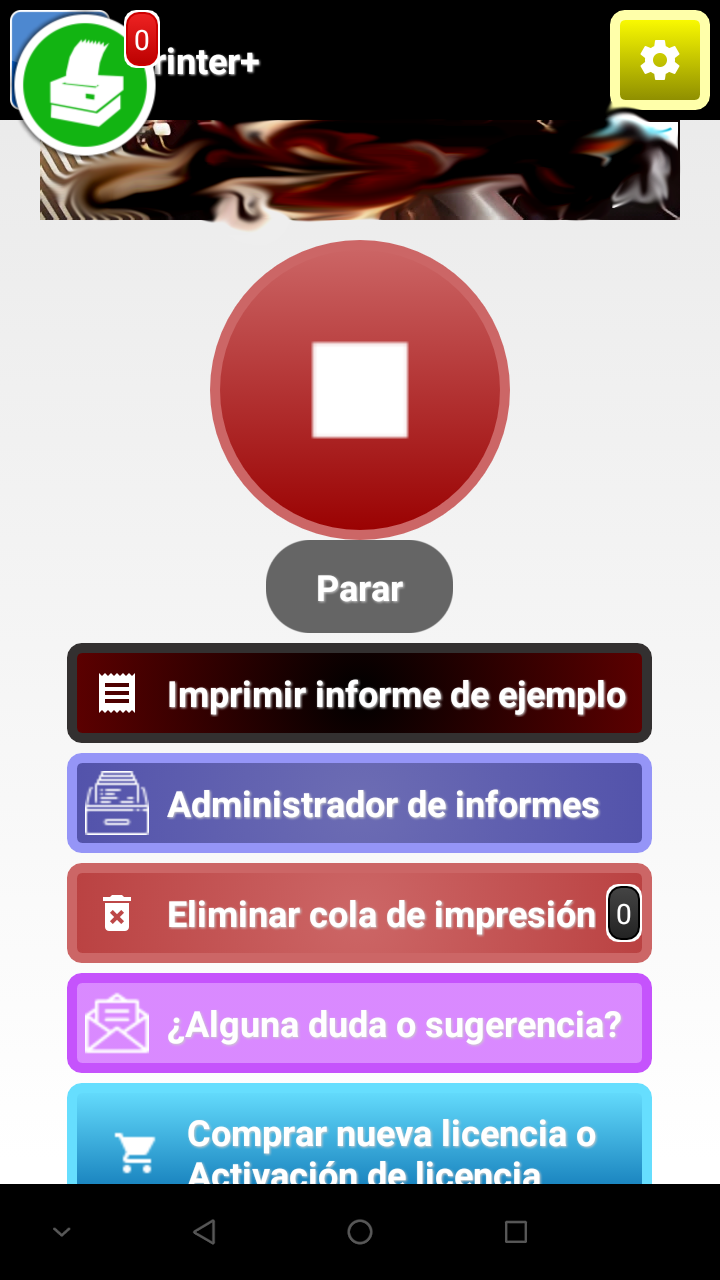
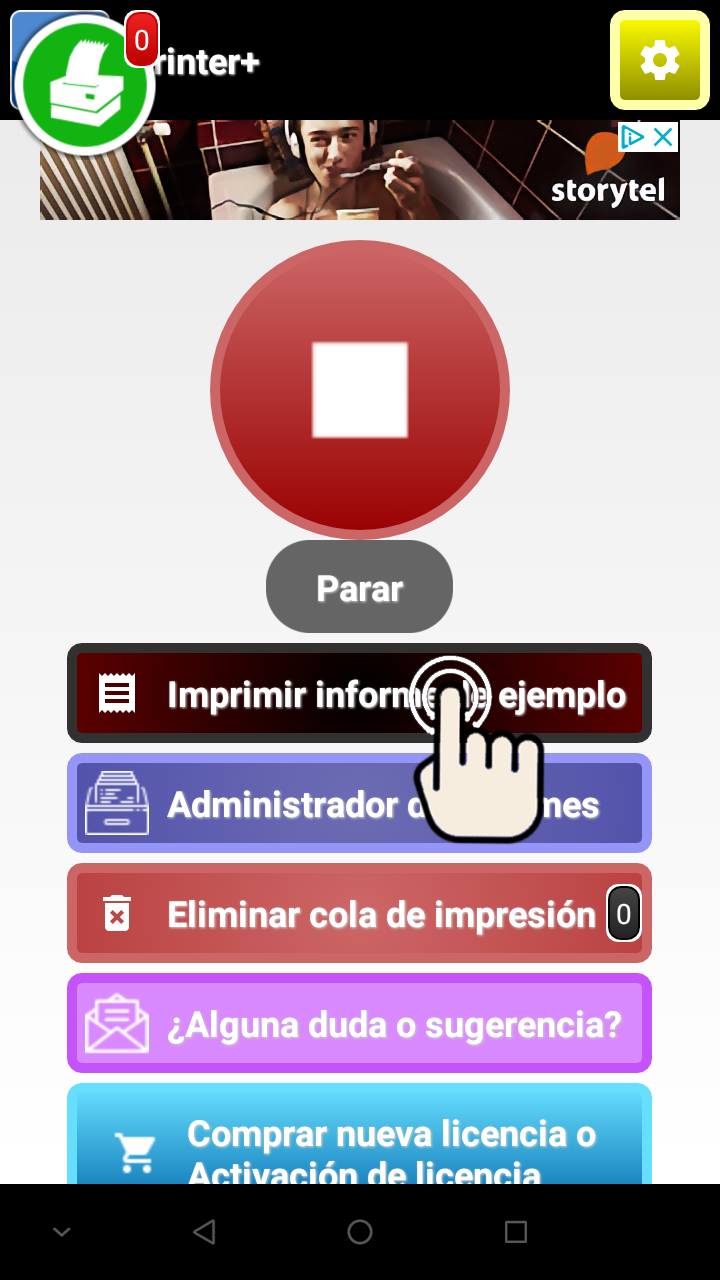
FIRST PRINT OR TEST
Having configured the printer we proceed to the first test print to see if everything works correctly.

GUIDE FOR DEVELOPERS
- USING THE JAVA SDK (ANDROID STUDIO PROGRAMMING)
- USE OF THE WEB SDK (HTML AND JAVASCRIPT PROGRAMMING)
- USE OF THE SYSTEM PRINTING SERVICE, (GOOGLE CHROME HTML AND JAVASCRIPT)
1- USE OF THE JAVA SDK (ANDROID STUDIO PROGRAMMING)
Introduction
Android library for Printer+, which allows you to easily communicate with different types of thermal printers via USB, WIFI, Bluetooth in a few simple instructions.
To use this tool you do not need to know ESC/POS or the specifications of each printer manufacturer. You just need to know how to program in JAVA.
You can get the full sample code on our GitHub. In the following link.
https://github.com/rcties/PrinterPlusCOMM
Requirements
►JAVA programming know.
►Android Studio.
►Knowing Java Programming for Android.
►Android device with Printer+ installed.
►Printer compatible with Printer+.
Specifications
Printer+ works on devices with Android API 15 or higher.
This SDK currently serves for the following:
Text printing: Unicode characters, use your printer without limitations of page codes to print characters in any language.
Print images: You can print the images that are on your device, we recommend using max-width 400 pixels to work with most printers.
Print barcodes: You can choose and print different types of barcodes, but on some printer models we have put 13-digit CODE128 as the default barcode to work well on these printers.
Print QR: You can print QR codes of indefinite length.
Brands and models:
-Epson: WiFi, USB and Bluetooth. Several models. Tested on TM-T88IV.
-Bixolon: WiFi, USB and Bluetooth. Several models. Tested on SRP-350II Plus.
-Zjiang: Bluetooth. Most models. Tested on 5802LD, 8001LD y HS-589TAI.
-HOIN: Bluetooth.
-EXCELVAN: Bluetooth.
-SUNMI: Bluetooth. Tested on V1-B18.
-ZEBRA: Bluetooth. Tested on MZ-220.
-ZCS: Bluetooth. Tested on ZCS-103.
-STAR MICRONICS: USB, WIFI, Bluetooth. Tested on TSP-100.
License of the library
On this license we mean that you are free to use the library as you wish, there is no obligation to pay even for commercial use. That is, you can use it with full confidence in your projects to integrate communication with Printer+.
			Copyright 2017 RCTIES.


			Licensed under the Apache License, Version 2.0 (the "License");
			you may not use this file except in compliance with the License.
			You may obtain a copy of the License at


			http://www.apache.org/licenses/LICENSE-2.0


			Unless required by applicable law or agreed to in writing, software
			distributed under the License is distributed on an "AS IS" BASIS,
			WITHOUT WARRANTIES OR CONDITIONS OF ANY KIND, either express or implied.
			See the License for the specific language governing permissions and
			limitations under the License.
Download
Download the latest version from jcenter by Gradle:
implementation 'es.rcti:printcom:1.1.0'
ProGuard
If you use ProGuard you may need to add the following option:
-keep class es.rcti.printerplus.printcom.** { *; }
Quick use of the SDK
In your MainActivity.java or *.java put the following lines of JAVA code.
			//We create the Report Structure object

			StructReport msr = new StructReport();


			//we add a bit of previous configuration

			msr.addItemAlignment( StructReport.ALIGNMENT_CENTER );

			msr.addTextBold(false);

			msr.addTextUnderlined(false);

			msr.addItemSizeFont( StructReport.SIZE_FONT_3 );


			//Text printing order

			msr.addText("Hello World!");


			//Instruction to cut paper

			msr.addCut();


			//IInstruction to send the report made

			//to Printer+ to be printed.

			PrintTool.sendOrder(MainActivity.this, msr);
Advanced use of the SDK
PTo perform the following tests you need to import the classes indicated below:
			import es.rcti.printerplus.printcom.models.PrintTool;

			import es.rcti.printerplus.printcom.models.StructReport;
To start we need to create an instance of the Struct Report object:
StructReport msr = new StructReport();
How to print TEXT?
			//To align text you can use one of these three types

			//ALIGNMENT_CENTER, ALIGNMENT_LEFT or ALIGNMENT_RIGHT


			//We will implement centered alignment

			msr.addItemAlignment( StructReport.ALIGNMENT_CENTER );


			//To enable or disable bold text

			msr.addTextBold(false);


			//To enable or disable the underline

			msr.addTextUnderlined(false);


			//To enable or disable reverse mode

			msr.addTextReverseMode(false);


			//To put the font size, there are 8 sizes.

			//Goes from SIZE_FONT_1 to SIZE_FONT_8

			msr.addItemSizeFont( StructReport.SIZE_FONT_1 );


			//To write text

			msr.addText("Hello");


			//To send paper cut order.

			msr.addCut();


			//To send the entire report to Printer+.

			PrintTool.sendOrder(MainActivity.this, msr);
Printing text in columns
If you know how to use JAVA String format, you can do it easily.
			msr.addItemAlignment(StructReport.ALIGNMENT_CENTER);

			msr.addItemSizeFont(StructReport.SIZE_FONT_2);

			msr.addText("MY BUSINESS");

			msr.addItemSizeFont(StructReport.SIZE_FONT_1);

			msr.addText("my current address - postal code");

			msr.addText("my phone - email address");

			msr.addText("\n");

			msr.addItemAlignment(StructReport.ALIGNMENT_CENTER);

			msr.addText(String.format(Locale.US, "%-13.13s %8.8s %8.8s",
			        "DESCRIPTION",
			        "QUANTITY",
			        "PRICE"));

			msr.addText(String.format(Locale.US, "%-13.13s %8.8s %8.8s",
			        "SALE ITEM 1",
			        "1.00",
			        "2.75€"));

			msr.addText(String.format(Locale.US, "%-13.13s %8.8s %8.8s",
			        "SALE ITEM 2",
			        "5.00",
			        "0.99€"));

			msr.addText(String.format(Locale.US, "%-13.13s %8.8s %8.8s",
			        "SALE ITEM 3",
			        "3.00",
			        "9.99€"));

			msr.addText("\n");

			msr.addItemAlignment(StructReport.ALIGNMENT_RIGHT);

			msr.addItemSizeFont(StructReport.SIZE_FONT_2);

			msr.addText("TOTAL: "+"37.67");

			msr.addItemSizeFont(StructReport.SIZE_FONT_1);

			msr.addText("\n");

			msr.addItemAlignment(StructReport.ALIGNMENT_CENTER);

			msr.addText("Thank you very much!");

			msr.addCut();

			PrintTool.sendOrder(MainActivity.this, msr);
Printing text in unicode
			@Override

			protected void onCreate(Bundle savedInstanceState) {

			   super.onCreate(savedInstanceState);

			   setContentView(R.layout.activity_main);


			   Button btn = (Button) findViewById(R.id.btn);

			   btn.setOnClickListener(new View.OnClickListener() {

			     @Override

			     public void onClick(View v) {

			       StructReport msr = new StructReport();


			       //SOME PREVIOUS CONFIGURATION

			       msr.addItemAlignment( StructReport.ALIGNMENT_CENTER );

			       msr.addTextBold(false);

			       msr.addTextUnderlined(false);

			       msr.addItemSizeFont( StructReport.SIZE_FONT_3 );


			       //TEXT PRINT

			       msr.addText("Good Job! "+getEmojiByUnicode(0x1f44D));


			       msr.addCut();


			       PrintTool.sendOrder(MainActivity.this, msr);

			     }

			   });

			}


			public String getEmojiByUnicode(int unicode){

			   return new String(Character.toChars(unicode));

			}
Note: To print unicode texts from an EditText, you do not need to use anything special.
			//Example obtaining content from an EditText that contains unicode characters.

			//To write emojis or any character.

			msr.addText(myEditTextVar.getText().toString());
How to print BARCODES?
Print Bar Codes is very simple. It has the following features to adjust your barcodes as they are:
-HRI (Human Readable Interpretation), below (Write below), above (Write over) o both (Write above and below).
-ALIGNMENT , left , center o right .
-TYPE , code93, code128, ITF, EAN13, ..., etc. //DEPRECATED ONLY IN USE CODE128
-HEIGHT (default 60).
-WIDTH //DEPRECATED.
Example of barcode with below HRI:
			//By default the different types of printers have the barcode set

			msr.addItemAlignment( StructReport.ALIGNMENT_CENTER );

			msr.addBarcodeHRI( StructReport.BARCODE_HRI_BELOW );

			msr.addBarcodeData( "1234567890128" );

			msr.addCut();

			PrintTool.sendOrder(MainActivity.this, msr);
How to print IMAGES?
Image printing is easy. It has the following features to adjust your images:
-ALIGNMENT: left, center o right.
-PATH o BITMAP content.
►Using the full path to the image file:
			msr.addItemAlignment( StructReport.ALIGNMENT_CENTER );

			msr.addImagePath("your/path/to/file/XYZ.png");

			msr.addCut();

			PrintTool.sendOrder(MainActivity.this, msr);
►Using a Bitmap:
			msr.addItemAlignment( StructReport.ALIGNMENT_CENTER );

			msr.addImageBitmap( myBitmapVar );

			msr.addCut();

			PrintTool.sendOrder(MainActivity.this, msr);
2- USE OF THE WEB SDK (HTML AND JAVASCRIPT PROGRAMMING)
Requirements
►Programming know HTML, JavaScript.
►IDE: Plain text editor.
►Android device with Printer+ installed.
►Printer compatible with Printer+.
►Web browser preferably installed Chrome.
How to implement the examples on a website?
To implement these examples in your own web, you have to write the HTML code inside the body tag in any sublevel.
                    <html>

                      <head>

                      </head>

                      <body>

                        <button  onclick="window.location='printerplus://send?text='+document.getElementById('report').innerHTML;">

                          Send to Printer+

                        </button>

                        <xmp id="report" style="">

                          <!-- EL CÓDIGO VA AQUI -->

                        </xmp>

                      </body>

                    </html>
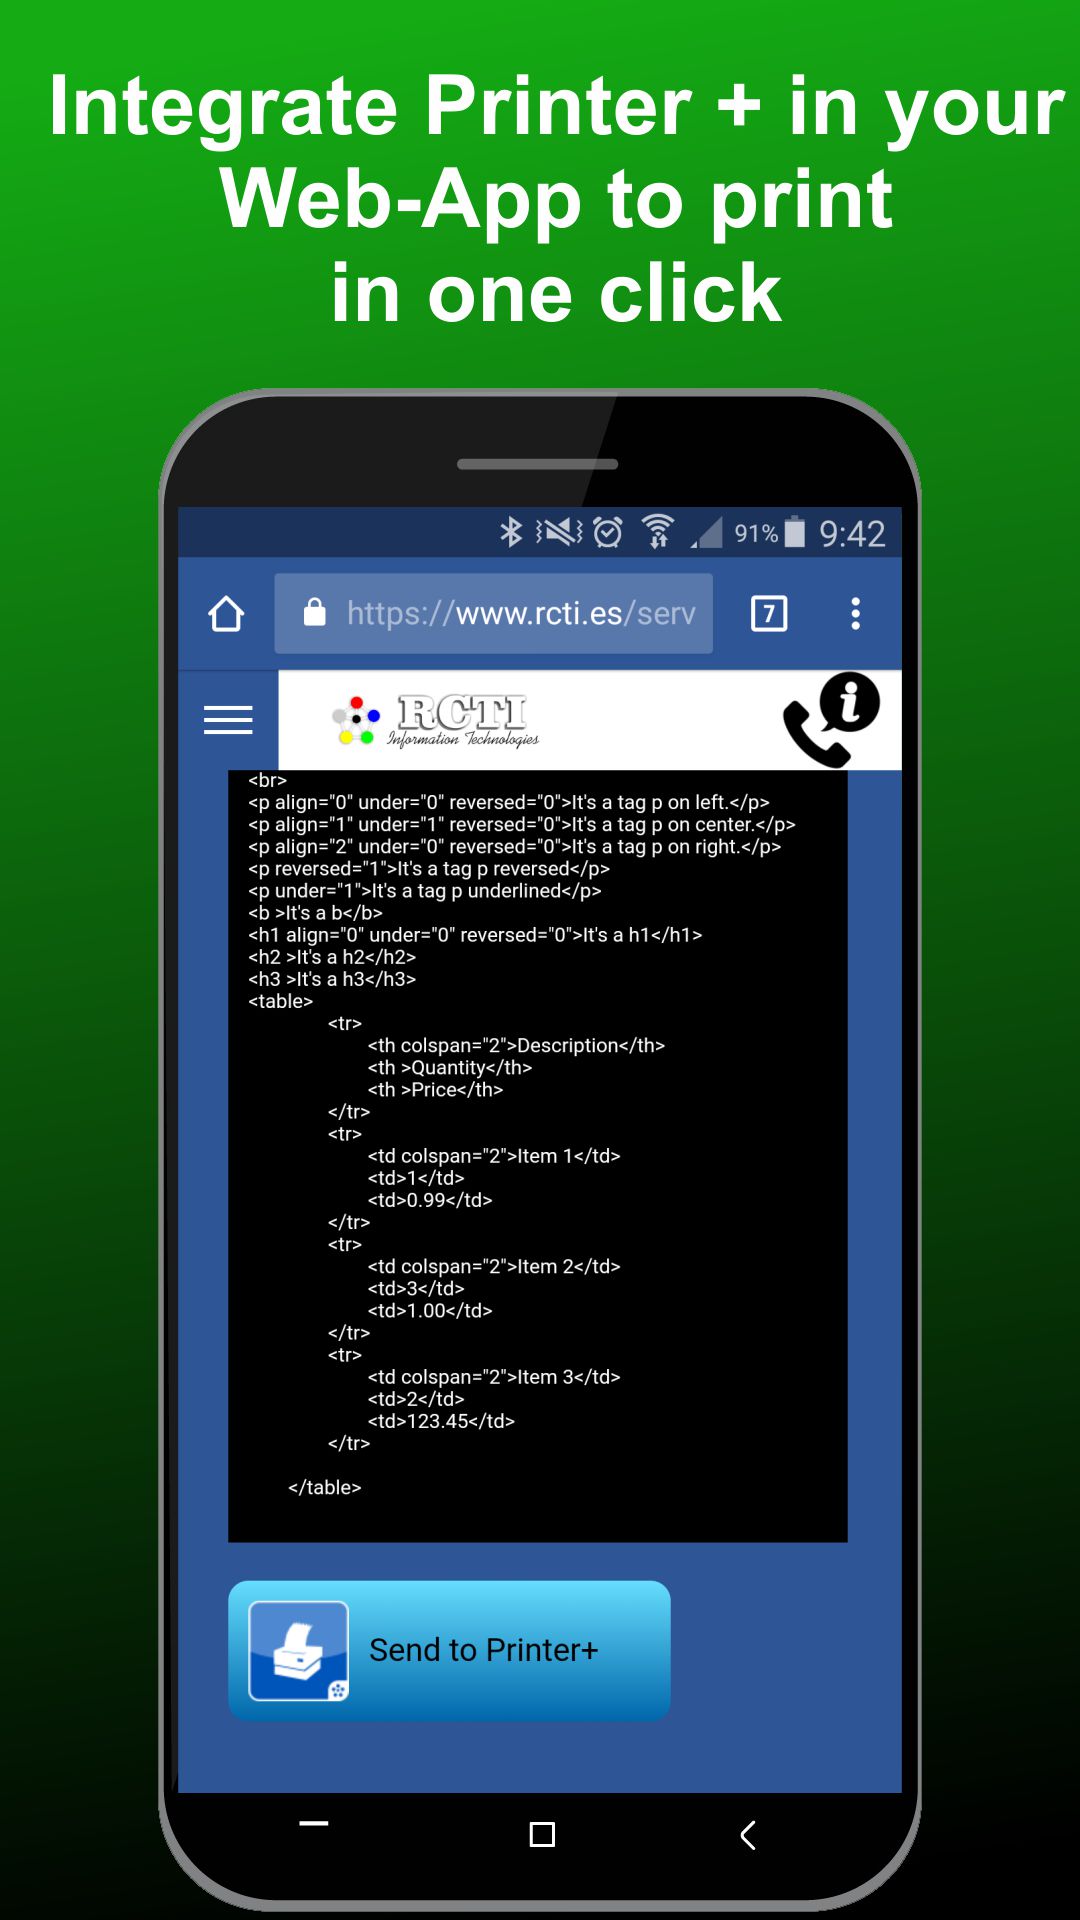
By inserting this code into an HTML page we will see that we see a button that says "Send to Printer+" and clicking on it, if we are on device and Printer+ is installed, it will open the Printer+ viewer to be able to print.
How to print Text?
To print text we have the following tags: p, text, h1, h2, h3, h4, h5, h6 y h7.
Each of the tags allows its use with parameters such as:
►size: Allows you to choose the font size that can range from 1 smallest to 8, which is the largest.
►align: It allows to choose the alignment, being 0 left, 1 centered, 2 right.
►bold: It allows to put the text in bold when it is activated putting its value in 1. By default it is 0 (deactivated).
►under: It allows to put the text underlined when it is activated by setting its value to 1. By default it is 0 (deactivated).
►reversed: It allows to put the text in inverse color when it is activated putting its value in 1. By default it is 0 (deactivated).
                    <!-- Tag p and text are similar -->


                    <!-- Tag p without parameters -->

                    <p>Hola Mundo!</p>


                    <!-- Tag p with size 2 -->

                    <p size="2">Hola Mundo!</p>


                    <!-- Tag p with centered alignment and inverse color -->

                    <p align="1" reversed="1" >Hola Mundo!</p>


                    <!-- h1 to h7 can not use size, bold -->

                    <h1 align='0'>ENCABEZADO 1 IZQUIERDA</h1>

                    <h2 align='1'>ENCABEZADO 2 CENTRADO</h2>

                    <h3 align='2'>ENCABEZADO 3 DERECHA</h3>


                    <!-- How to create a table -->

                    <table>

                      <tr>

                        <th colspan="2">Description</th>

                        <th >Quantity</th>

                        <th >Price</th>

                      </tr>

                      <tr>

                        <td colspan="2">Item 1</td>

                        <td>1</td>

                        <td>0.99</td>

                      </tr>

                      <tr>

                        <td colspan="2">Item 2</td>

                        <td>3</td>

                        <td>1.00</td>

                      </tr>

                      <tr>

                        <td colspan="2">Item 3</td>

                        <td>2</td>

                        <td>123.45</td>

                      </tr>

                    </table>
How to print Images?
To print images we have the tag img.
In this tag the parameters are:
►align: It allows to choose the alignment, being 0 left, 1 centered, 2 right.
►src: url of the image you want to access and print.
                    <!-- Centered image -->

                    <img align="1" src="https://www.rcti.es/source/logo.png" >
How to print Barcodes?
To print barcodes we have the tag barcode.
In this tag the possible parameters are:
►align: It allows to choose the alignment, being 0 left, 1 centered, 2 right.
►height: Allows to set values between 30 and 254, to define the height.
►hri: Allows you to write the content of the bar code using values ranging from 0 to 3.
Being:
hri = 0, the understandable content will not be printed.
hri = 1, the understandable content will be printed on the top (TOP) of the barcode.
hri = 2, the understandable content will be printed on the bottom (BOTTOM) of the barcode.
hri = 3, The understandable content will be printed on both the top and bottom of the bar code.
                    <p>Barcode without HRI (Human Readable Interpretation)</p>

                    <barcode align="1" height="90" hri="0" >01234ABC</barcode>


                    <p>Barcode with HRI value set on top</p>

                    <barcode align="1" height="90" hri="1" >01234ABC</barcode>


                    <p>Barcode with HRI value set on bottom</p>

                    <barcode align="1" height="90" hri="2" >01234ABC</barcode>


                    <p>Barcode with HRI value set to both (top and bottom)</p>

                    <barcode align="1" height="90" hri="3" >01234ABC</barcode>
How to print QR?
To print QR codes we have the qr tag.
In this tag the possible parameters are:
►align: It allows to choose the alignment, being 0 left, 1 centered, 2 right.
                    <p>QR centered</p>

                    <qr align="1" >https://www.rcti.es/source/logo.png</qr>
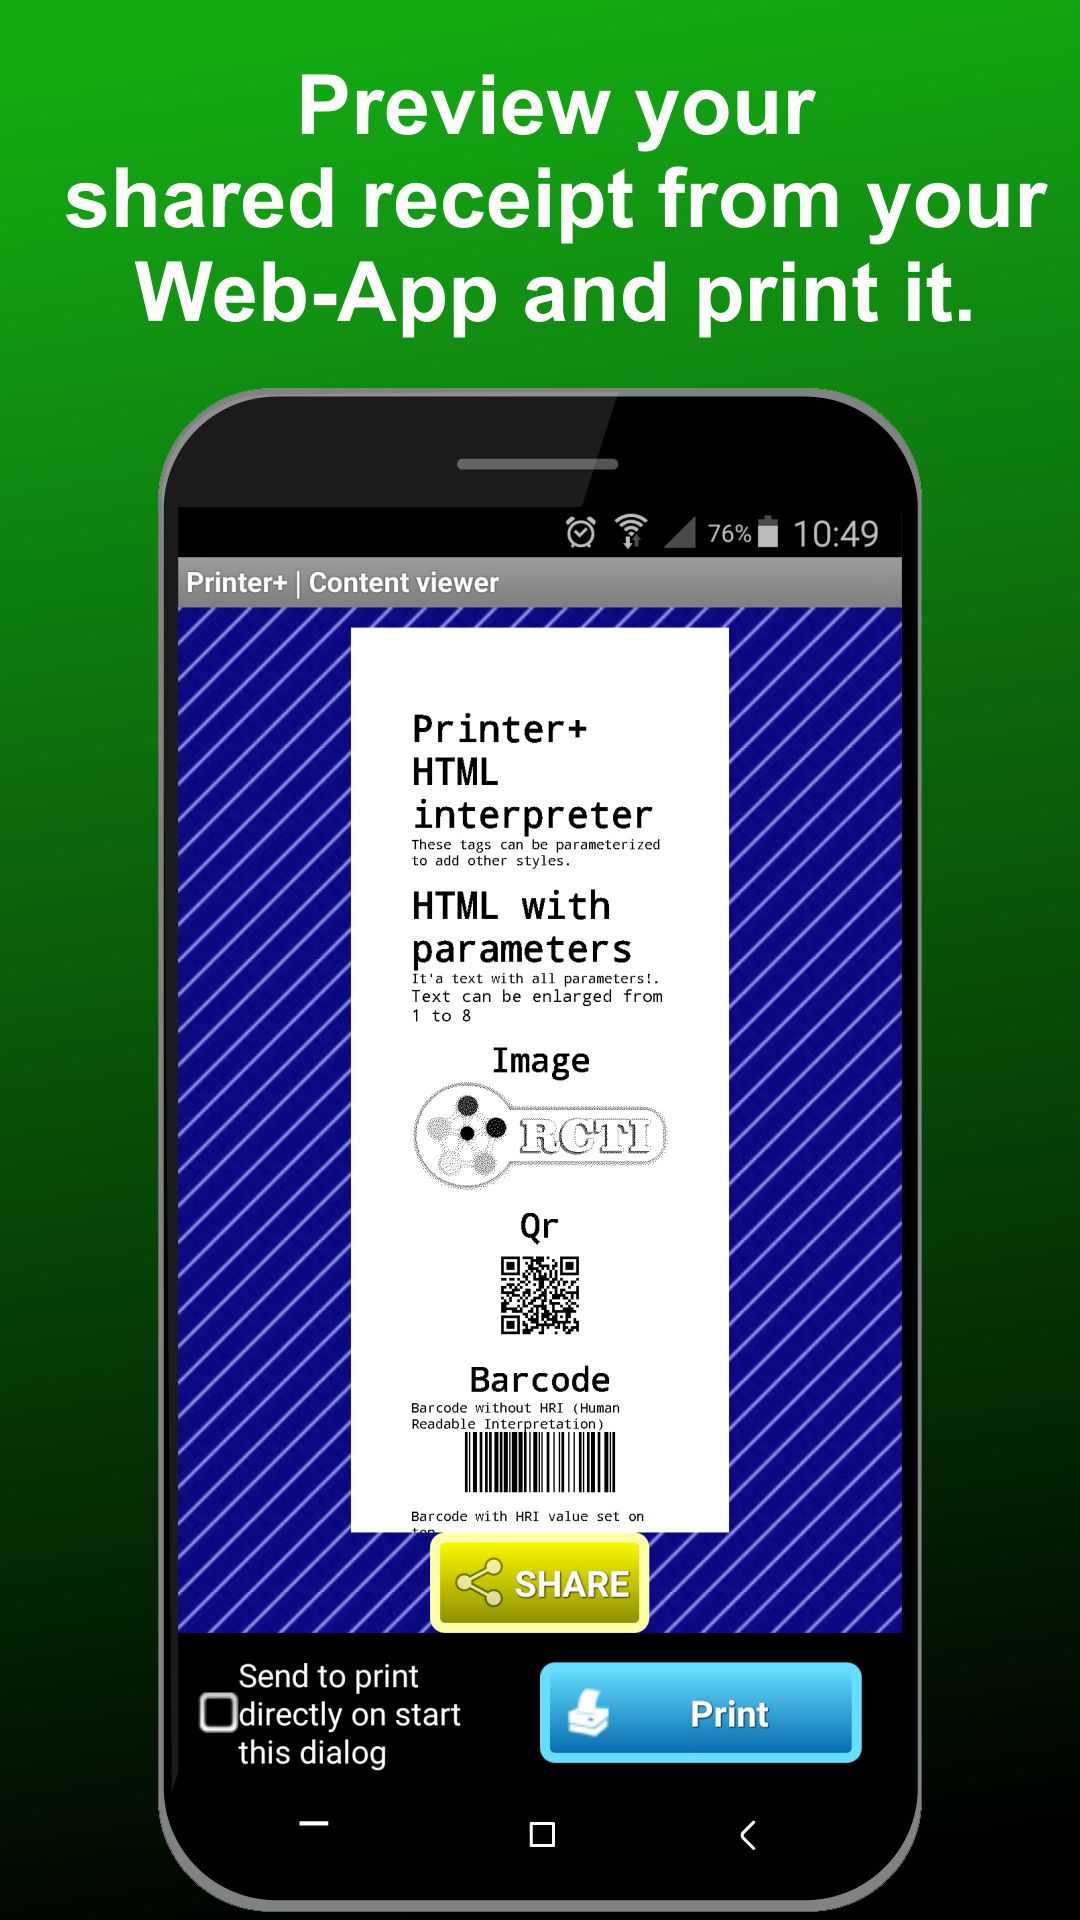
Finally, we provide an example that can test the functioning of the HTML code in Printer +.
<img align="1" src="https //www.rcti.es/source/logo.png" />

<h1>Welcome to RCTI.ES apps</h1>

<qr align="1" >https://www.rcti.es</qr>

<br>

<table>

  <tr>

    <th colspan="2">Description</th>

    <th >Quantity</th>

    <th >Price</th>

  </tr>

  <tr>

    <td colspan="2">Item 1</td>

    <td>1</td>

    <td>0.99</td>

  </tr>

  <tr>

    <td colspan="2">Item 2</td>

    <td>3</td>

    <td>1.00</td>

  </tr>

  <tr>

    <td colspan="2">Item 3</td>

    <td>2</td>

    <td>123.45</td>

  </tr>

</table>

<br>

<p align="2" size="3">TOTAL: 999.99</p>

<br>

<barcode align="1" height="90" hri="3" >01234ABC</barcode>

<br>

<p align="1" >Thank you!</p>
3- USE OF THE SYSTEM PRINTING SERVICE, (GOOGLE CHROME HTML AND JAVASCRIPT)
In the following example we will see how to implement the print button that is used to save as PDF or send print directly to a printer through the use of a printing service integrated into the system.
If you want, you can see a working example of what we are going to implement in the following link:
http://jsbin.com/xegomajawa/edit?html,css,js,output.
Requirements
►Knowledge in HTML, JavaScript, CSS.
►IDE: Plain text editor.
►Android device with Printer+ installed and also Printer+ as System Print Service enabled.
►Printer compatible with Printer+.
►Web browser app, preferably Chrome.
Implementation
First a general idea of what we are doing.
If you want to have the functional code, replace each block with its corresponding content in blocks B! B2 and B3.
                    <!DOCTYPE html>

<html>

<head>

  	<meta http-equiv="Content-Type" content="text/html  charset=utf-8">

  	<title></title>


  	<!-- B1- JAVASCRIPT BLOCK THAT ACTIVATES AND IMPLEMENTES THE PRINTING FUNCTION -->

</head>

<body>

  	<!-- Printing button -->

  	<input type="button" onclick="newTabPrint('full_content')" value="Print" class="myPrintBtn" />


  	<!-- General content of report to be printed -->

      <div id="full_content" class="myReceipt">

        	<!-- B2- STYLE BLOCK -->


        	<!-- B3- HTML OF REPORT CONTENT -->

      </div>

</body>

</html>
B1 - JavaScript Block
                    <script type="text/javascript">


  	function newTabPrint(container_id) {


    		/* We get the content of report */

    		var mainContent = document.getElementById(container_id);


    		/* We create a new tab with the goals and styles that we want */

    	    var mcontent="<html>";


    	    var mhead="<head>";

    	    mhead = mhead+'<meta http-equiv="Content-Type" content="text/html; charset=utf-8">\n';

    	    mhead = mhead+'<title>MY NEW TAB PAGE TITLE</title>\n';

    	    mhead = mhead+'<meta name="viewport" content="width=device-width, initial-scale=1, maximum-scale=1">\n';

    	    mhead = mhead+'<head>\n';


    	    /* We add our content to the new tab */

    	    mcontent = mcontent+mhead;

    	    mcontent = mcontent+"<body onload=window.print()>\n";

    	    mcontent = mcontent+'<div id="full_content" class="myReceipt">\n'+mainContent.innerHTML+"</div>";

    	    mcontent = mcontent+"</body>";

    	    mcontent = mcontent+"</html>";


    	    /* We show the new tab */

    	    var w = window.open();

    	    w.document.head.innerHTML = mhead;

    	    w.document.body.innerHTML = mcontent;


    		/* Print service request */

    	    w.print();


  	}


</script>
B2 - CSS style block
<!-- Style to format or adjust the report a bit -->
<style type="text/css">

  	.myPrintBtn {

    		background:#2D882D;

    		color: #FFFFFF;

    		width: 100px;

    		height: 50px;

    		font-size: 18px;

    		font-weight: bolder;

  	}


  	/*

    		here we adjust the width of the report, this

    	   	value is useful 3 and 2 inches.

  	*/

  	.myReceipt {

    		display:block;

    		width: 300px;

    		color-adjust: exact;

    		-webkit-print-color-adjust: exact;

  	}


  	.myReceipt > img {

    		display: block;

    		width: 100%;

  	}


  	.myTable {

    		background: #000000;

  	}


  	.myTable tr > th {

    		color: #ffffff;

    		padding: 5px;

  	}

  	.myTable tr > td {

    		background: #ffffff;

    		padding: 5px;

  	}

  	.toRight {

    		text-align: right;

  	}

  	.toCenter {

    		text-align: center;

  	}

</style>
B3 - Bloque de contenido de informe
<!-- we print a logo first -->

<img src="https://www.rcti.es/source/test_logo.png" />

<h3 class="toCenter">HTML CODE TITLE</h3>

<!-- now we are going to print some text -->

<p>

  	My addres

  	My phone and e-mail

</p>

<!-- we print a table with the content formatted by the style -->

<table class="myTable">

  	<tr>

    		<th>DESCRIPTION</th>

    		<th>PRICE</th>

    		<th>QUANTITY</th>

    		<th>SUM</th>

  	</tr>

  	<tr>

    		<td>Bread</td>

    		<td>0.99</td>

    		<td>1</td>

    		<td>0.99</td>

  	</tr>

  	<tr>

    		<td>Onion</td>

    		<td>1.50</td>

    		<td>2.300</td>

    		<td>3.45</td>

  	</tr>

  	<tr>

    		<td>Tomato</td>

    		<td>3.50</td>

    		<td>2.550</td>

    		<td>8.93</td>

  	</tr>

</table>

<!-- we use headers as letter size -->

<h2 class="toRight">TOTAL: 13.37 €</h2>

<p class="toCenter">Thank you so much!</p>

<!-- You can add what you want as long

    as the web browser can render it -->
DOWNLOAD
You can download our latest version

RELATED APPS

F.A.Q
When you buy a license while the license is valid, it will not appear any advertising, or print watermarks "Printer + DEMO" and "www.rcti.es".
No, in the case that you wish to use your license in other devices, you can use it alternating the devices, that is, you have to first unlink it from the active device and then activate it in the other device.
We are currently only receiving payments by electronic methods. But there is a very interesting alternative that is the gift cards of Google Play. These cards can be found in most super markets and stores.
Once you buy one, you can buy quietly on Google Play with the balance of the gift card.
More info.
if we are in office hours (see contact) usually will take around one hour maximum. But outside of this maximum time it will take 12 hours.
When finalizing / making the purchase using PayPal there is usually an optional field that allows you to write and there you can write the destination e-mail that you wish to receive the license.
But if there is nothing in this optional field by default you will reach the e-mail associated with the PayPal account with which you made the payment.
If, after 5 minutes after a correctly processed purchase, you do not receive or activate the purchase on your device automatically. You can contact us by e-mail, phone or whatsapp to solve this problem. What if it will be necessary to indicate us the identifier GPA (Google Payments) of the purchase/s.
BUY LICENSE
►PLEASE, BEFORE PURCHASING CHECK:
1- YOUR DEVICE IS COMPATIBLE
2- PRINT HOW YOU WANT OR FULFILL YOUR EXPECTATIONS
SINCE THE DEMO MODE CAN BE TESTED FOR THE GENERAL BEHAVIOR OF THE APP.
►LICENSES WILL BE DELIVERED WITHIN 12 HOURS.
►IN THE LICENSE PACKS, THE EXPIRATION OF EACH LICENSE BEGINS AT THE TIME OF ITS ACTIVATION. THAT MEANS, IF THEY DO NOT ACTIVATE THEY KEEP THEIR DURATION.
** ONCE PURCHASED A LICENSE THERE IS NO RETURN **

ACCEPTED PAYMENT METHODS:
![]()
![]()
![]()
![]()
CONTACT
If you want to make any question, budget or assistance, you can do it by e-mail.
Consultations (during business hours):
► E-Mail: soporte@rcti.es
If you want to make any question, budget or assistance, you can do it by e-mail.
► E-Mail: soporte@rcti.es
We will respond in a maximum of 24 hours.